This document explains how to complete an eCommerce (ECOM) transaction using the GuestPay Hosted Payment Page.
eCommerce transactions are categorized as either Payments or Validations:
The GuestPay Hosted Payment Page supports Apple Pay and Google Pay for Payments only; these methods are not available for Validations.
To initiate a transaction via the Hosted Payment Page, the calling service must send a POST request to the following URL:
https://pay-hosted-payment-page.ci.guestline.app/api/checkout/sessions
Note: The URL varies depending on the environment.
The body of the post should contain the details of the transaction, e.g. amount, CRS reference, customer billing details. A successful post will return a unique URI to display the payment page in the customer's browser.
Details and examples below
IMPORTANT
Each merchant is issued a unique `ClientId` and `APIKey`. These credentials must be configurable within your solution.
ClientId.APIKey.To go live, you’ll need to perform end-to-end testing with Guestline’s support. Ensure you have the following production credentials:
- Production SiteId (ClientId): Obtain from your Account Manager.
- Production API Key: Contact your Account Manager to receive your APIKey, specific to your ClientId.
The API uses Basic Authentication with a Base64 encoded string in the format of ClientId:ApiKey. If the Authorization header is missing or incorrect, the endpoint will return a 401 Unauthorized error.
For instance, if:
LAGERMAN943f362947a2404582a268937d23bc33
The Basic Authentication text before encoding is:
LAGERMAN:943f362947a2404582a268937d23bc33
After encoding in Base64, the text becomes:
TEFHRVJNQU46OTQzZjM2Mjk0N2EyNDA0NTgyYTI2ODkzN2QyM2JjMzM=
To use this in the Authorization header:
AuthorizationBasic TEFHRVJNQU46OTQzZjM2Mjk0N2EyNDA0NTgyYTI2ODkzN2QyM2JjMzM=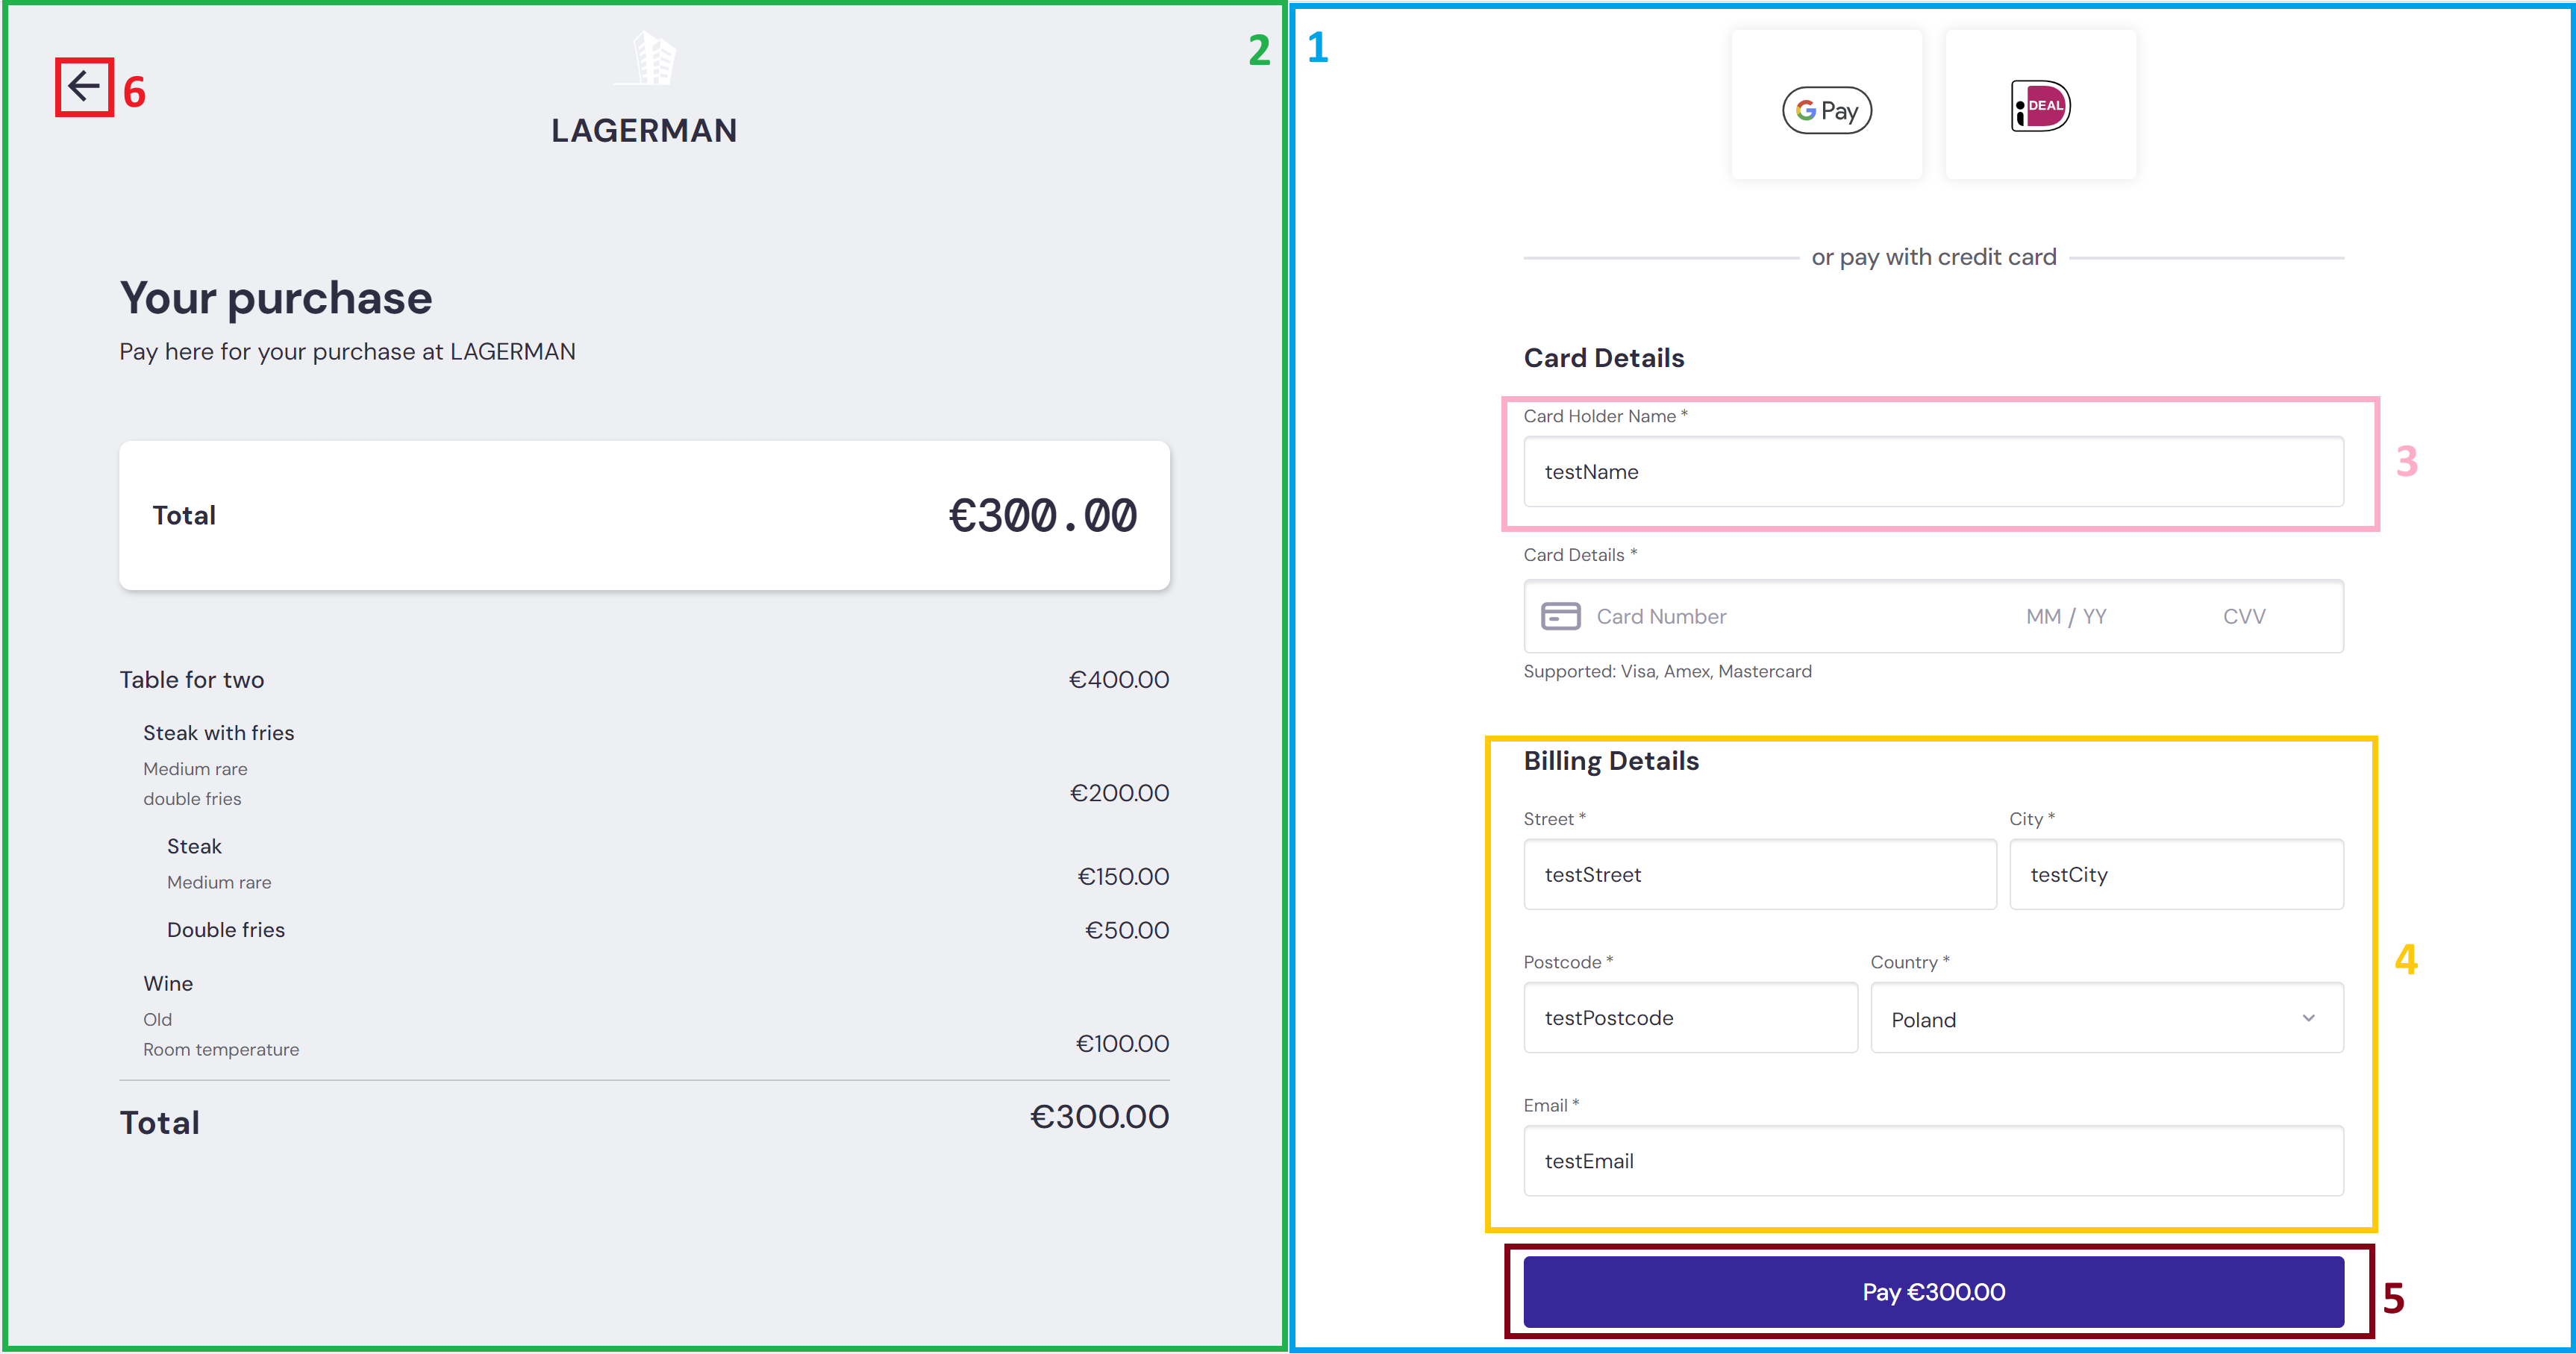
| Item |
Description |
|
|---|---|---|
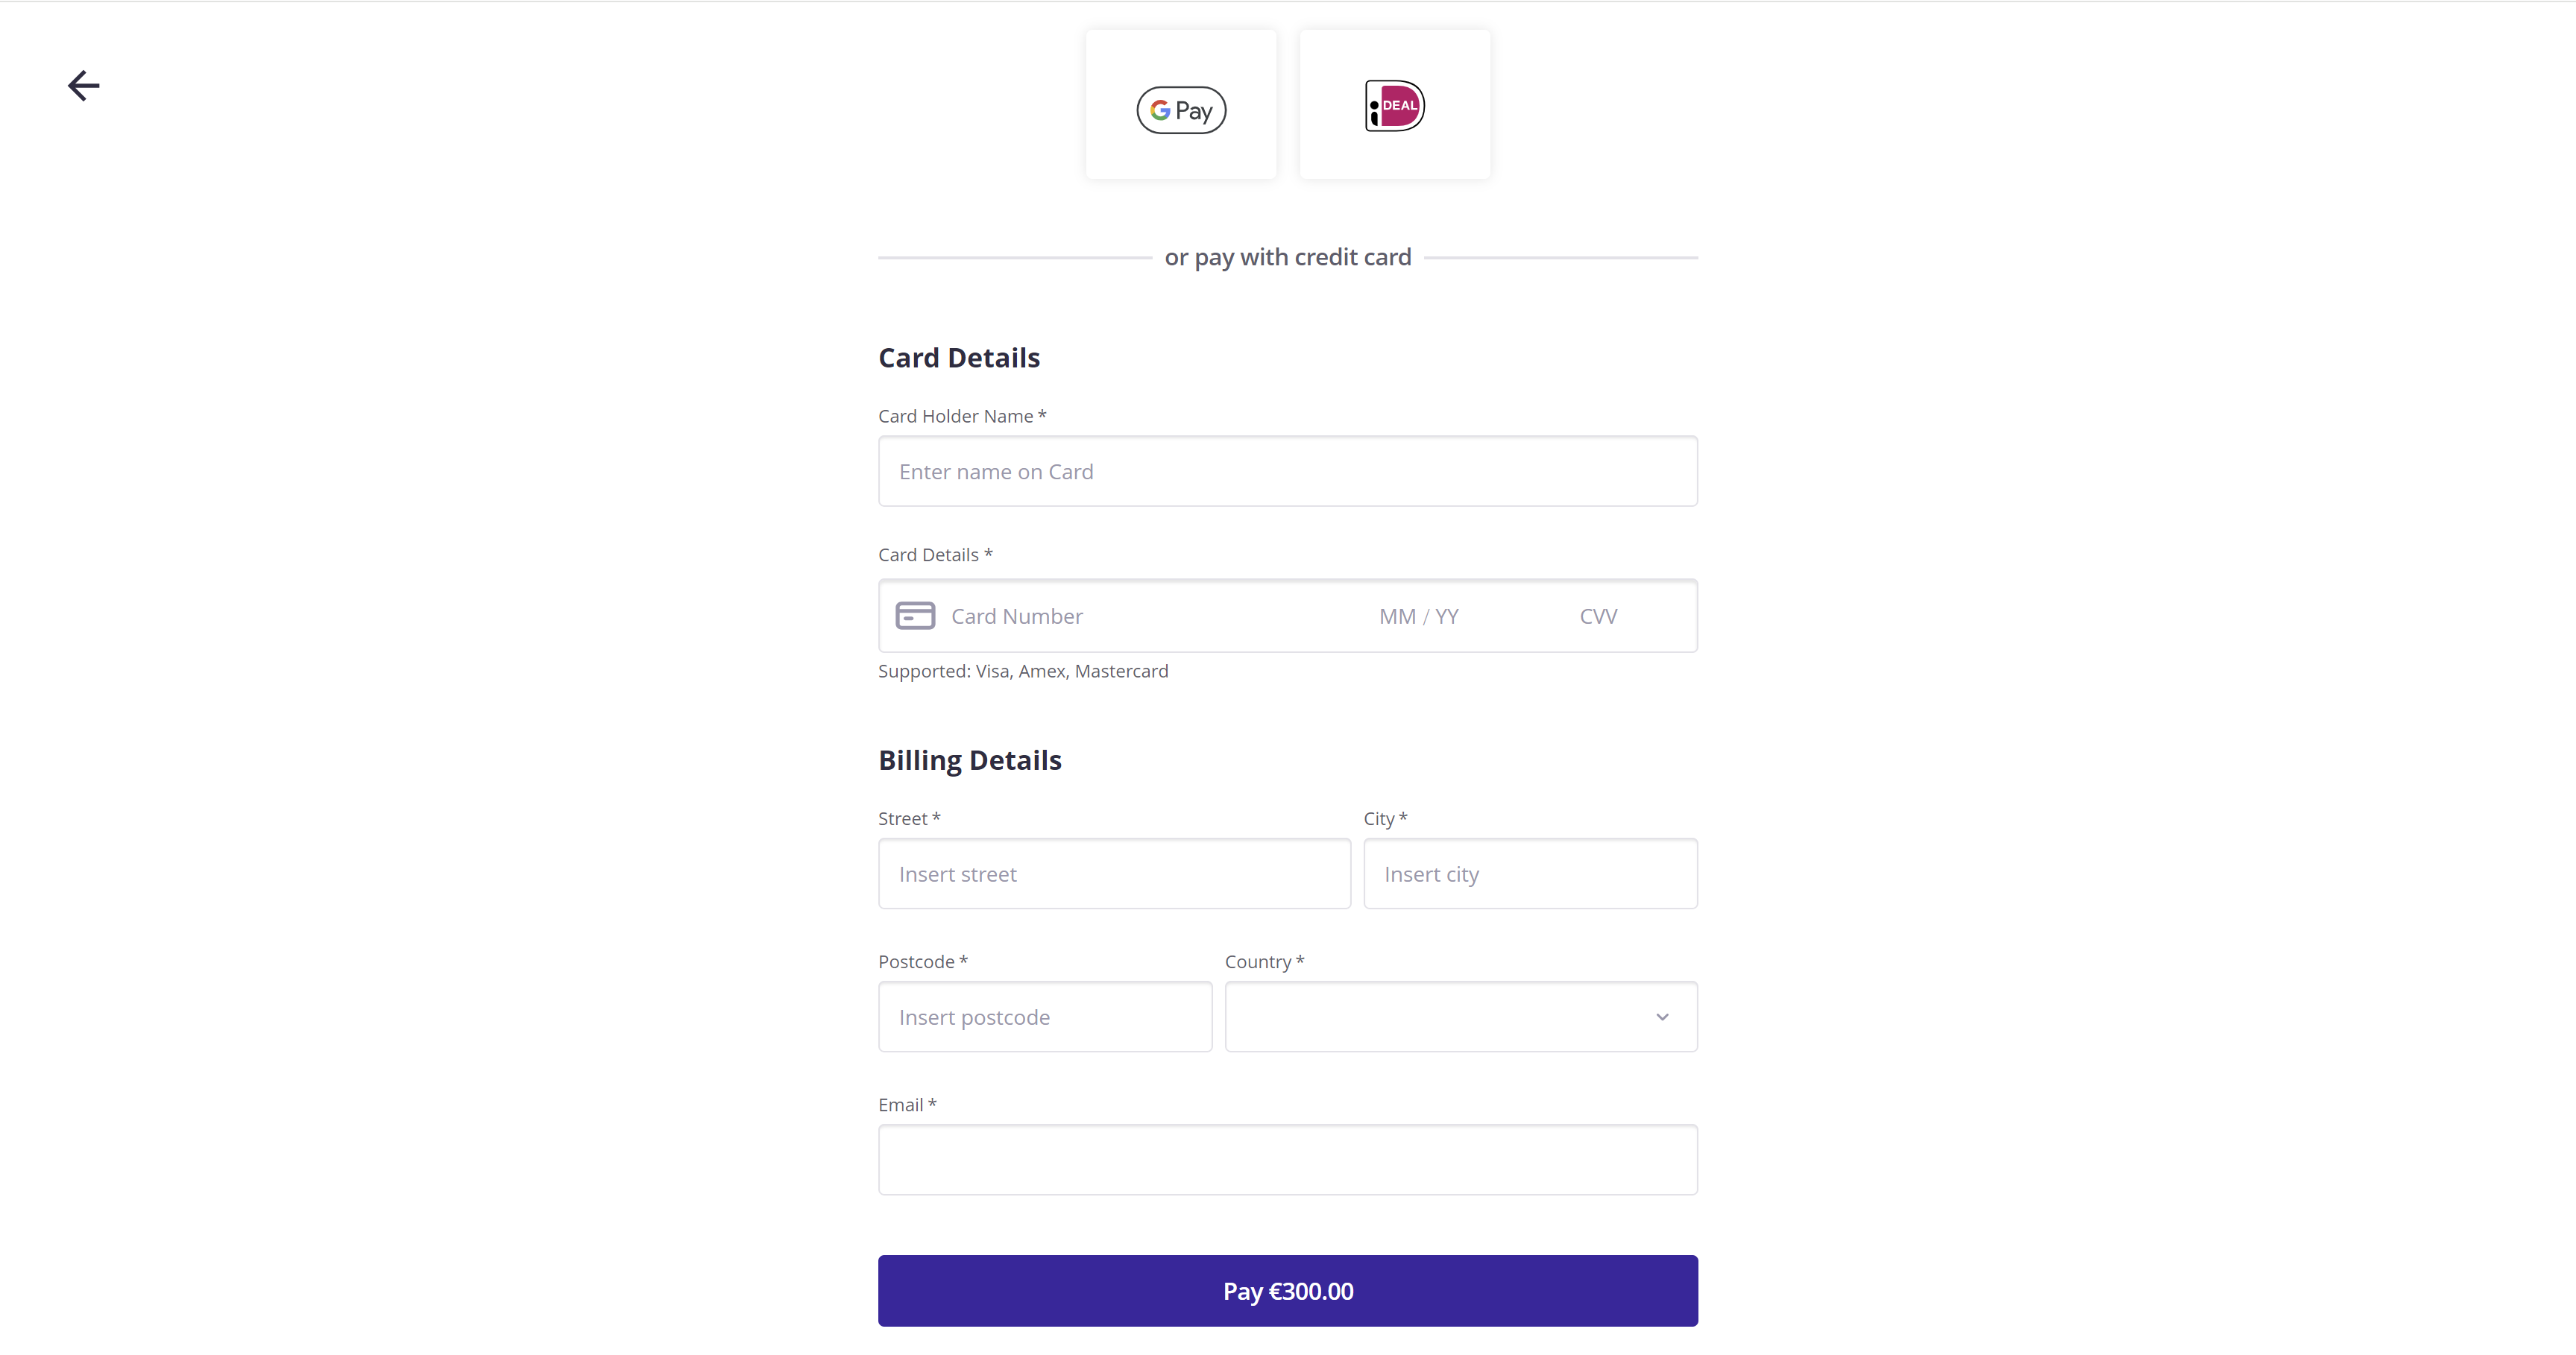
| 1 | Payment form | This will always be rendered. Used in simple flows where Order Details are not required. |
| 2 |
Order Details | Section will render when LineItems are provided. |
| 3 | Card Holder Name | Can be prefilled if details are provided. |
| 4 | Billing Details | Can be partially prefilled when details are provided. |
| 5 | Action Button | When Authentication Only is true (Validation) label of Submit will display. When false, or not provided, label of Pay _amount will display. |
| 6 | Button | Redirects customer to the cancelUrl provided. |
{
    "amount": 30000,
    "reference": "testref",
    "currencyCode": "EUR",
    "redirectUrl": "https://www.testRedirectUrl.com",
    "cancelUrl": "https://www.testCancelUrl.com"
}
{
    "amount": 30000,
    "reference": "testref",
    "currencyCode": "EUR",
    "redirectUrl": "https://www.testRedirectUrl.com",
    "cancelUrl": "https://www.testCancelUrl.com",
    "authenticationDetails": {
        "authenticationOnly": true
    }
}
These requests will render the Payment form alone.
{
    "amount": 30000,
    "reference": "testref",
    "currencyCode": "EUR",
    "cardHolderName": "testName",
    "billingDetails": {
        "email": "testEmail",
        "street": "testStreet",
        "city": "testCity",
        "postcode": "testPostcode",
        "country": "PL"
    },
    "redirectUrl": "https://www.testRedirectUrl.com",
    "cancelUrl": "https://www.testCancelUrl.com",
}
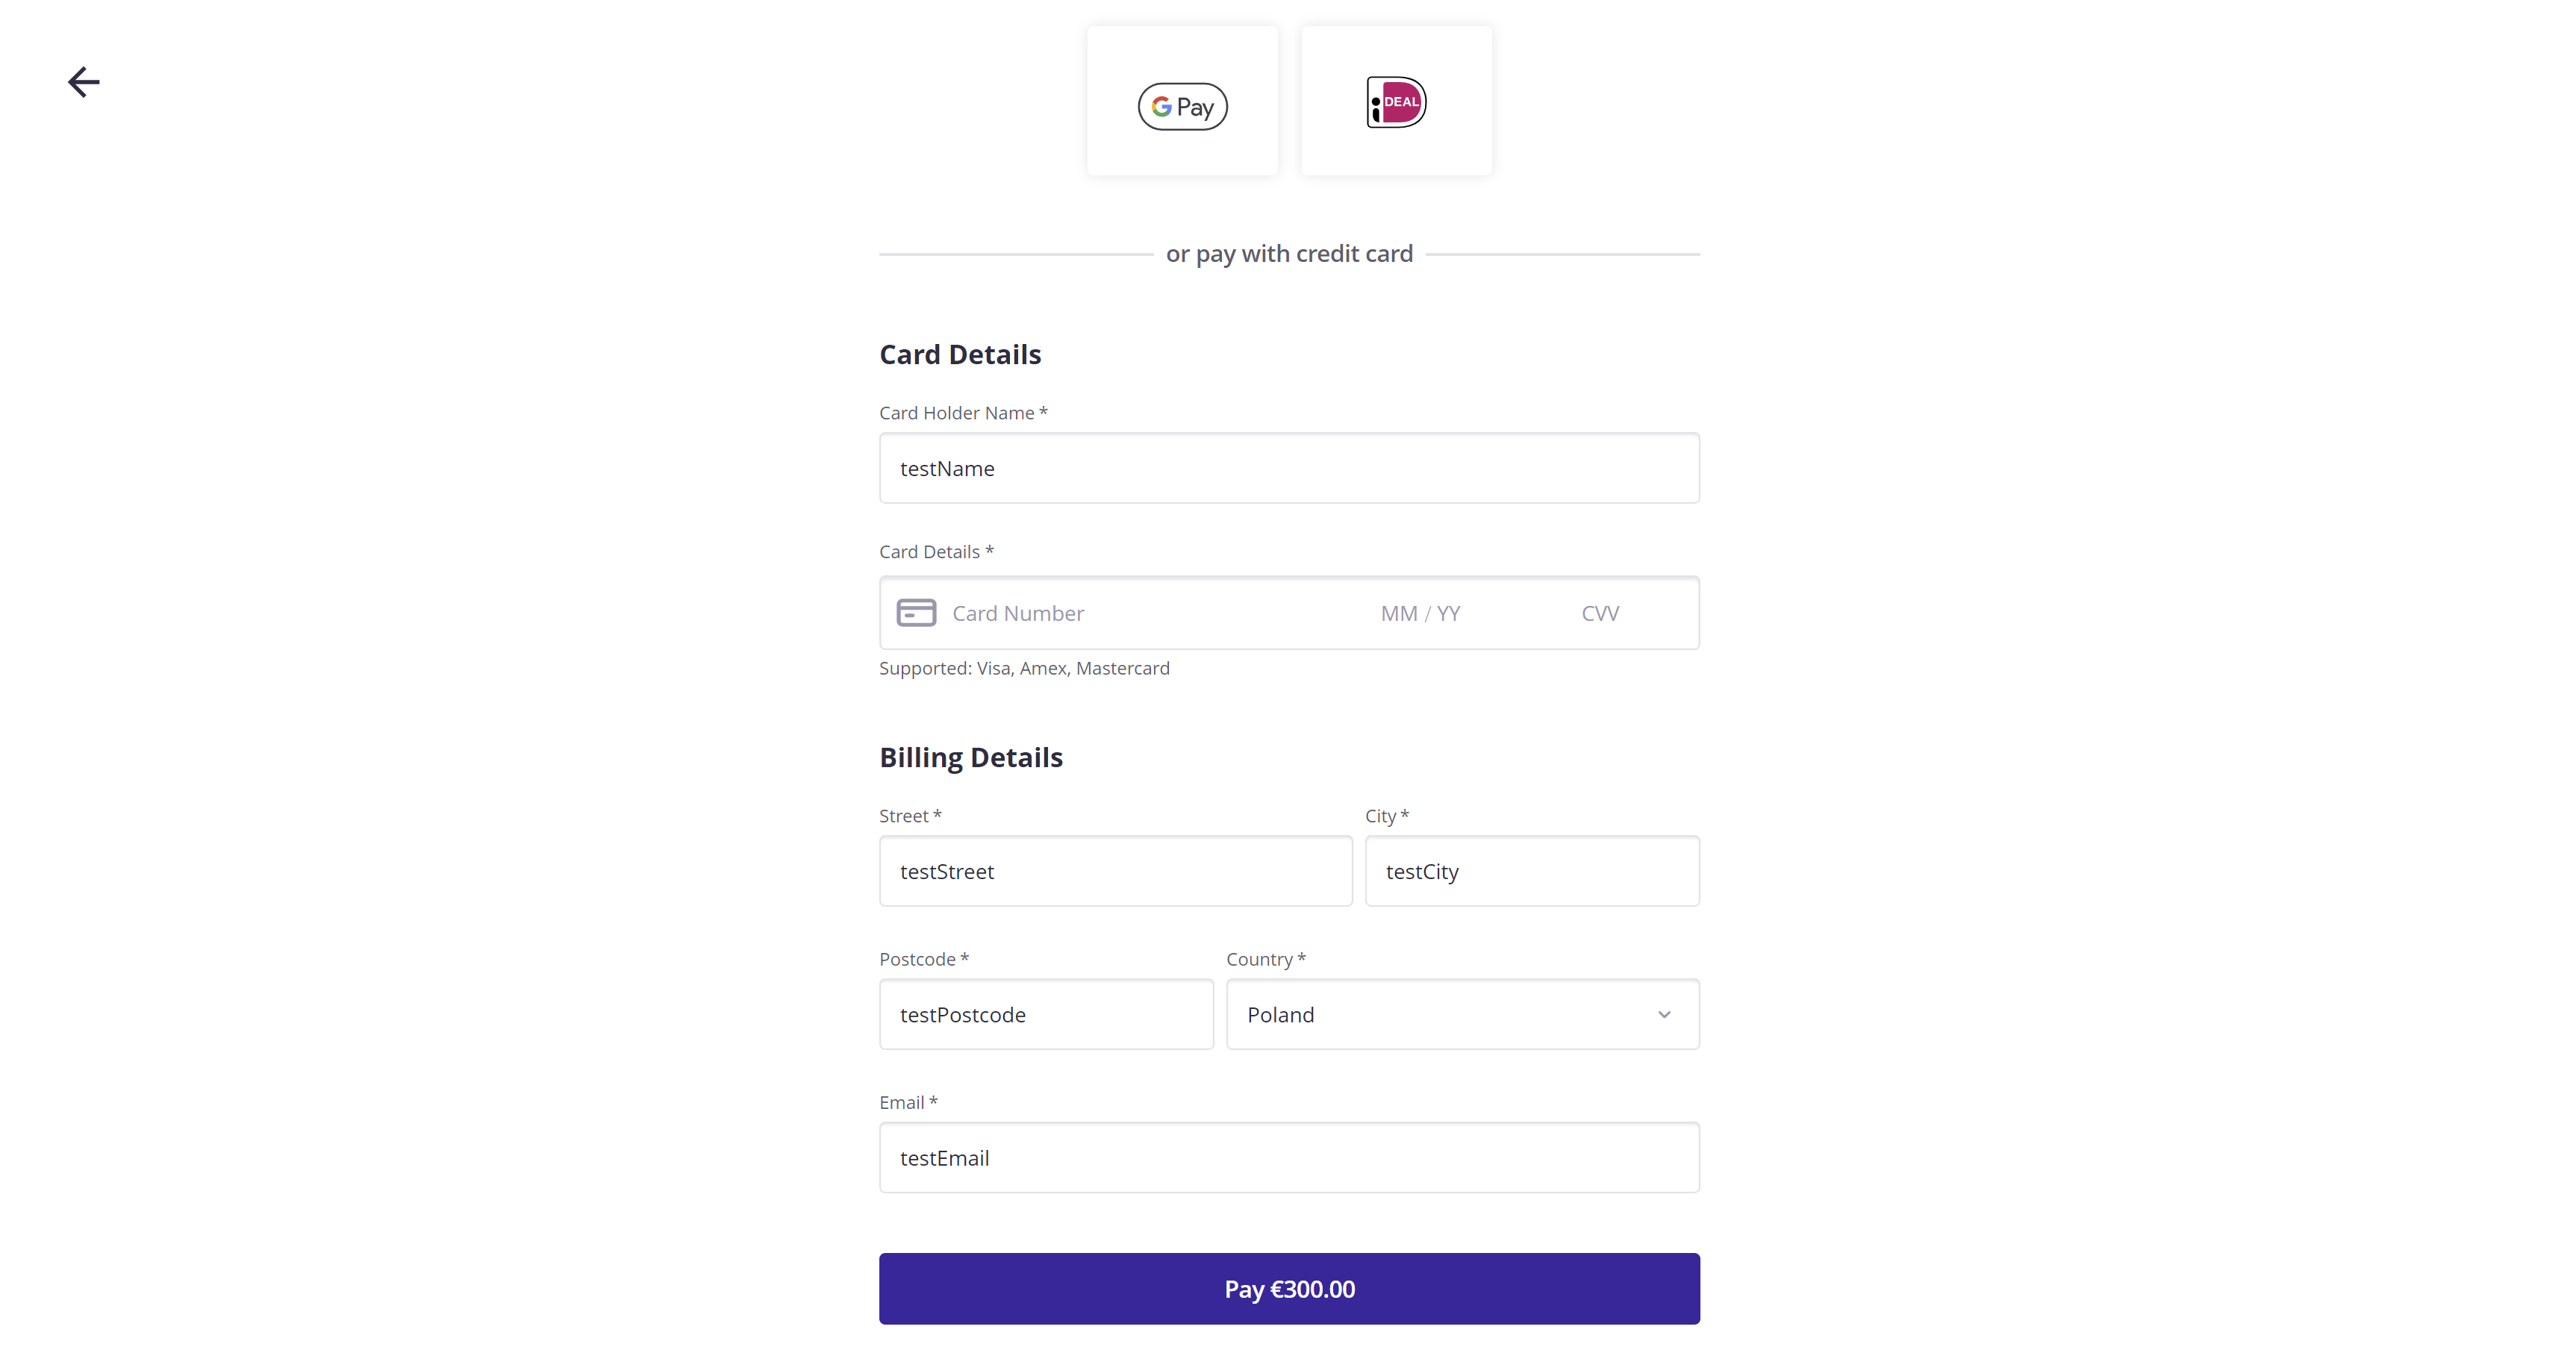
Providing Billing Details and Card Holder name will prefill the form:
{
    "amount": 40000,
    "reference": "testref",
    "currencyCode": "EUR",
    "order": {
        "lineItems":
        [
            {
                "description": "Table for two",
                "amount": 40000,
                "children":
                [
                    {
                        "description": "Steak with fries",
                        "detailRows": ["Medium rare", "double fries"],
                        "amount": 20000,
                        "children":
                        [
                            {
                                "description": "Steak",
                                "detailRows": ["Medium rare"],
                                "amount": 15000
                            },
                            {
                                "description": "Double fries",
                                "amount": 5000
                            }
                        ]
                    },
                    {
                        "description": "Wine",
                        "detailRows": ["Old", "Room temperature"],
                        "amount": 10000
                    }
                ]
            }
        ]
    },
    "cardHolderName": "testName",
    "billingDetails": {
        "email": "testEmail",
        "street": "testStreet",
        "city": "testCity",
        "postcode": "11-111",
        "country": "PL"
    },
    "redirectUrl": "https://www.testRedirectUrl.com",
    "cancelUrl": "https://www.testCancelUrl.com"
}
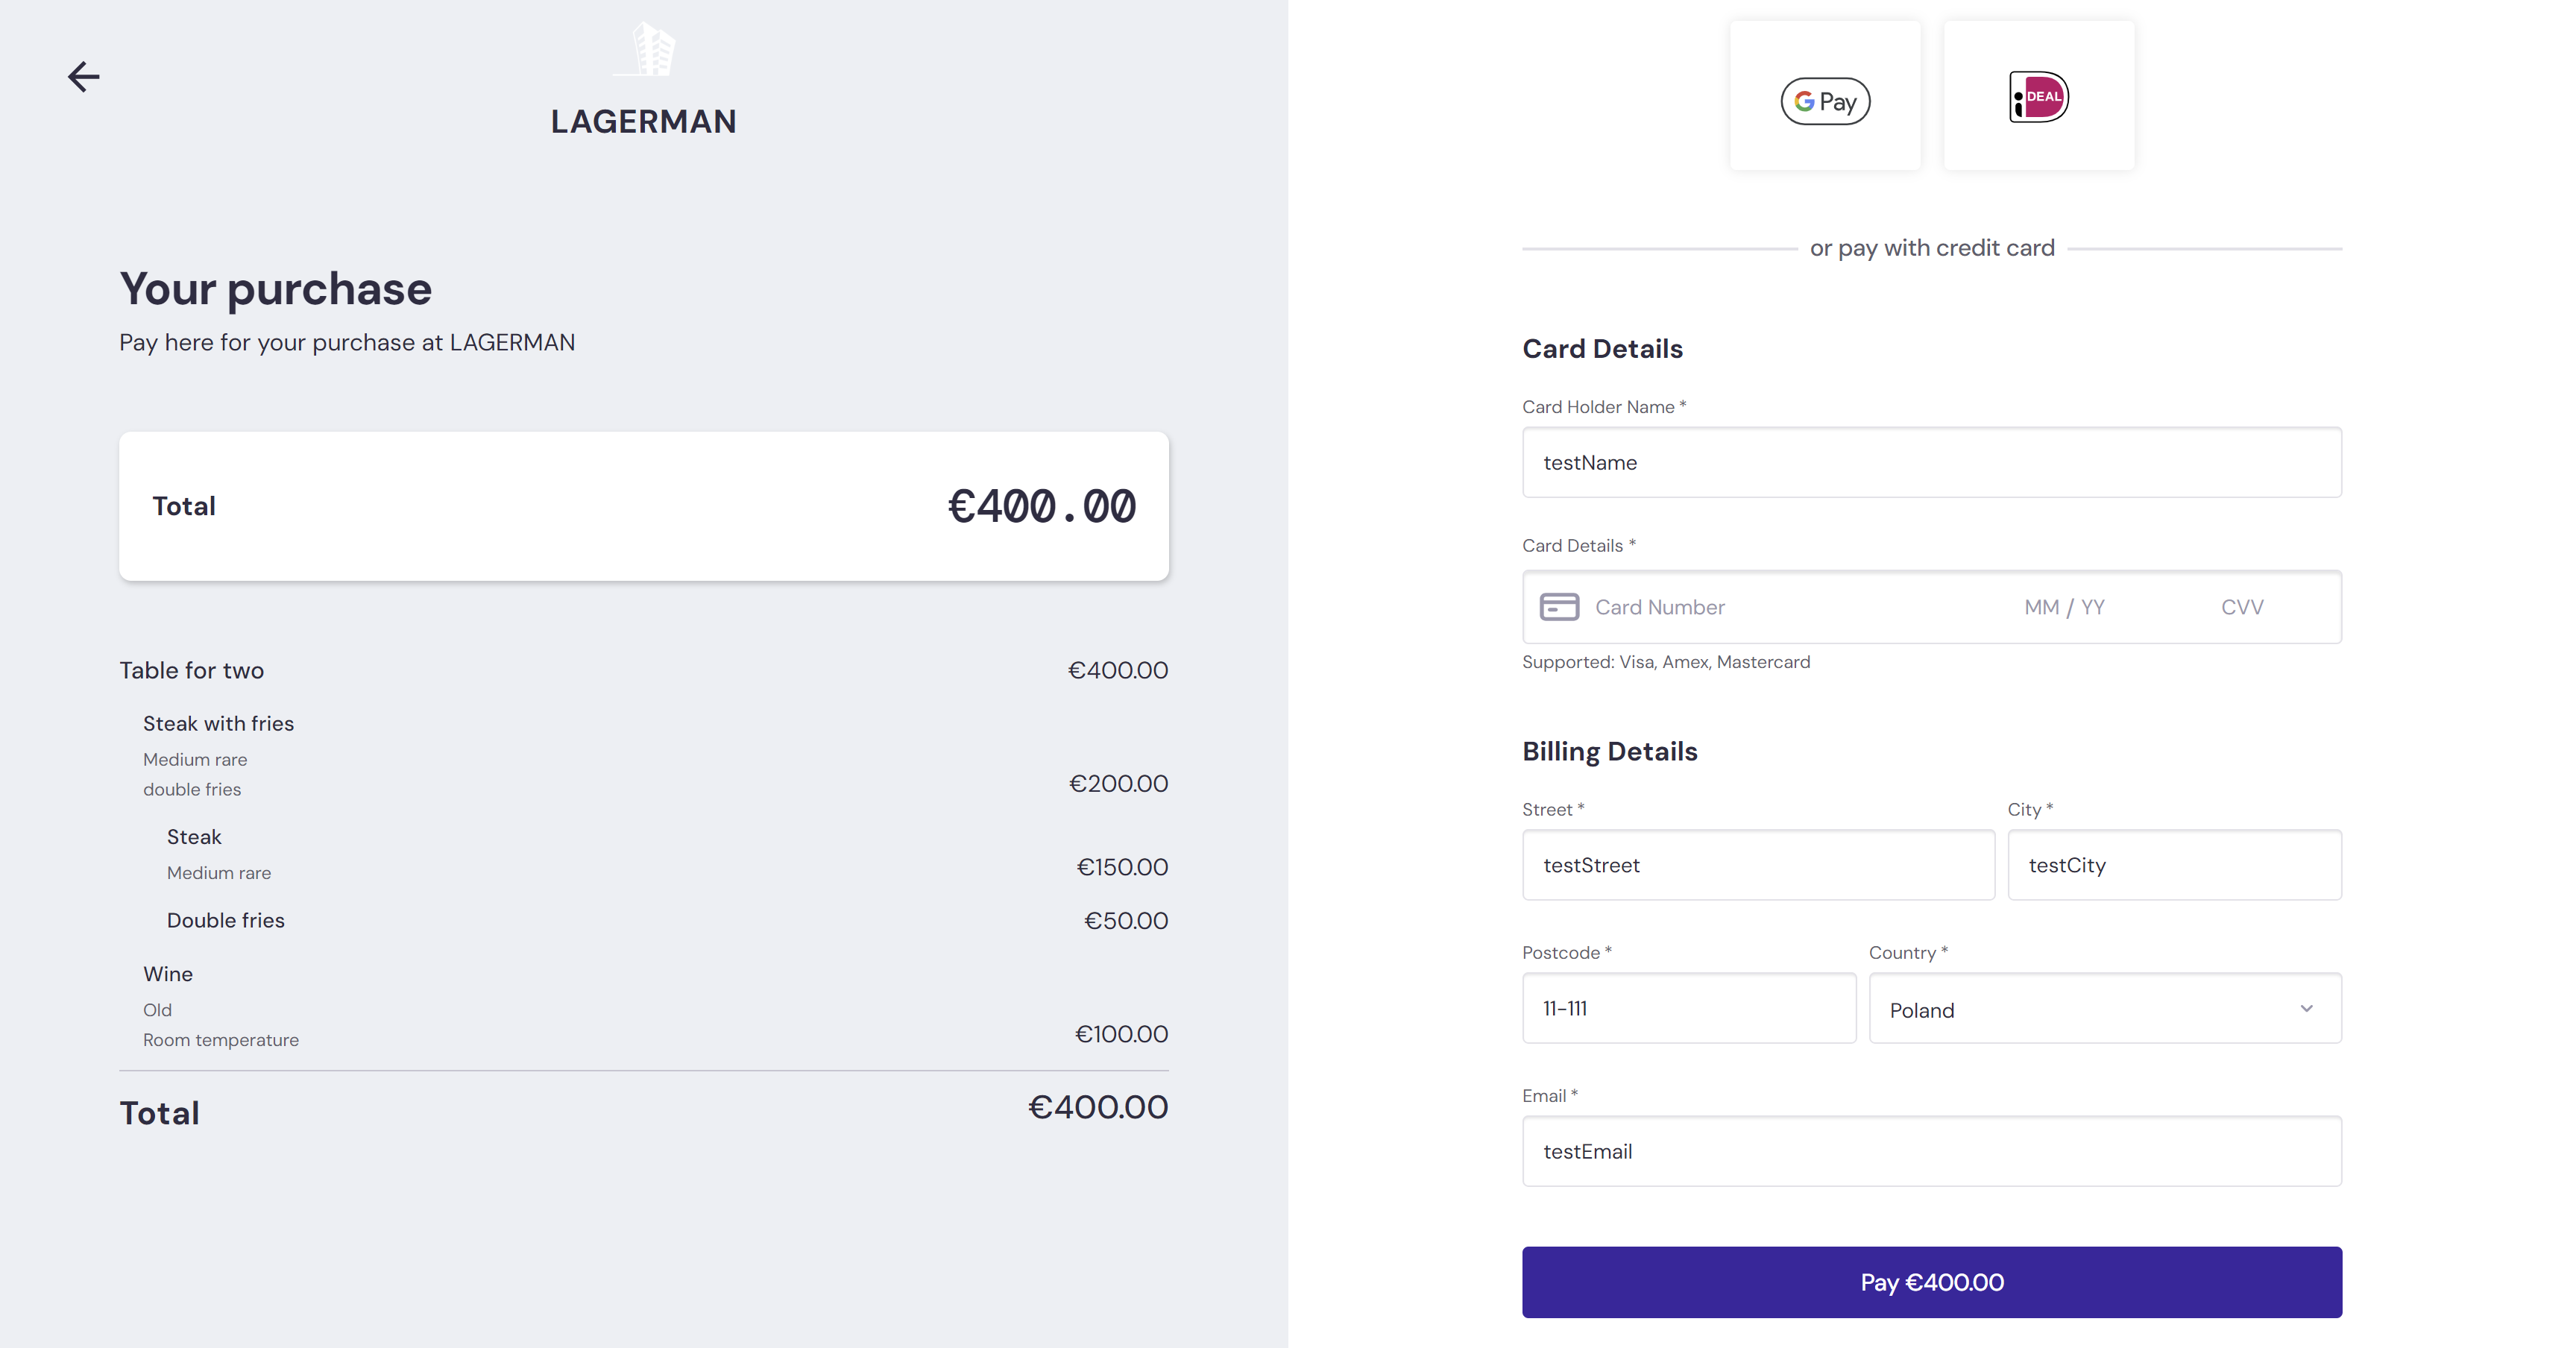
Providing order details with items generates the Payment Details view on the left
{
    "amount": 40000,
    "reference": "testref",
    "currencyCode": "EUR",
    "order": {
        "items":
        [
            {
                "reference": "CrsNumber1",
                "amount": 20000
            },
            {
                "reference": "CrsNumber2",
                "amount": 20000
            }
        ]
    },
    "cardHolderName": "testName",
    "billingDetails": {
        "email": "testEmail",
        "street": "testStreet",
        "city": "testCity",
        "postcode": "11-111",
        "country": "PL"
    },
    "redirectUrl": "https://www.testRedirectUrl.com",
    "cancelUrl": "https://www.testCancelUrl.com"
}
Providing invoice details with items allows deposits to be added to PMS after a payment transaction is successful
IMPORTANT
Sending invoice data should be done either via GuestPay Hosted Payment Page or via Roomlynx API. Doing it in both places at once can result in duplicates!